Sunday, March 30, 2014

Zweet Zweet Zwickel

'Zweet Zweet Zwickel' is a registered trademark of Zwillingsbruderbrau and cannot be used or replicated in any form without the express written consent of Zwillingsbruderbrau.

One year ago I was in St. Louis with good friends and family tearing up the town for my bachelor party.  One of the highlights of the trip was a visit to Urban Chestnut Brewing Company.  A relatively new brewery on the St. Louis scene, they had an amazing line-up of old school european ales and lagers along with more popular american craft brews.  One of the beers I enjoyed most was their Zwickel.  Zwickel can be paralleled to (if not 'also known as') German kellerbier.  It's young lager.  Hazy, malty, yeast turbid, raunchy, young.  All kinds of different and delicious flavors that are typically muted when a lager goes through a traditional lagering period.  These beers are meant to be fresh and funky.  I loved it.

I want to brew another batch of Muhleisen All Grain Double Decocted Oktoberfest again this year, but in order to do so I need loads of fresh healthy lager yeast.  I couldn't think of a better way to build up a yeast culture than with a lower gravity Zwickel-style wort.  Working off the ingredients provided by Urban Chestnut and also off the recipe from brewing legend Michael Dawson (linked here), I came up with this recipe (for 10 gallons):

16# German Pils
2# German Carahell
1# German Carafoam

128F for 20 minutes, 149F for 30 minutes, 158F for 30 minutes, 168F for 10 minutes.

1.5oz of 6.9%AA Tradition hop at 60 minutes (basically Hallertau)
0.5oz of 6.9%AA Tradition hop at 15 minutes

Target OG: 1.048
Target IBU: 20

My mash got all screwed up so my schedule was really like 132F for 20 minutes, 151 for 40 minutes, 154F for 20 minutes, straight to sparging.  We will see what the result of this debacle is.  Hopefully it doesn't cause another 'Debockle'.

For this batch I had to make a 1 gallon starter using 4 smack packs of WY2487 Hella-Bock yeast.  I hit my gravity numbers and with the ground water still cold I was able to chill to 60F in 15 minutes with my JZ style immersion chiller.  I could have gone colder but I wanted to pitch the yeast starter a little warm and once activity has taken off I will get it into a 50-55F fridge for primary.

This brew will not be lagered.  In two weeks I'll keg it and rinse the yeast cake for the yeast I need for my Oktoberfest.  As with all my brews, I can't wait to see how this one turns out!

I bought a new 'large-face' thermometer for my boil kettle.  Just cuz.

Mash.

First runnings, you can see how short the thermometer stub is.  Also the color of the wort.  Also that awesome mash paddle.


Another shot to see the color in hose.

Sparging.

This is my new 'graduated cylinder' for taking gravity measurements.   My old tube gave out on me so I had to think on my feet.  Footed pilsener glass just seemed fitting and it worked well.  I like the color.

BOIL.  I collected a little too much pre-boil but that's because I got a  better efficiency than expected.

Hops.  Smellin right.

I really like this Spiedel fermentor.  Makes life very easy with these 10 gallon batches I've been doing.  I also bought an oxygenation system to step up my game.  The red can is a disposable canister of O2 from Home depot ($10, should provide oxygen for at least 5 batches).  I got the regulators, hosing, and stainless oxygenation stone (2 micron) from more beer.  We will see what results it yields.


In two weeks I will have a crazy Oktoberfest brew day.  Hopefully it goes well.  In about 4 weeks I'll be tapping into some young and hazy Zweet Zweet Zwickel.

Saturday, February 22, 2014

Back to Brewing - 10 Gallons of American IPA

It has been a long winter.  The cold that shook the south put me in a serious hibernation mode.  It was all we could do to get out of a warm bed every morning, get to work, get home, get dinner, get cozy, get in bed, repeat.  The last couple of months I've done very little in the way of anything extracurricular.  I needed a break from brewing and frigid temps only further encouraged me.

Well it's started warming up here again and today was a picturesque day to brew a batch of beer.  Temps swelled into the upper 60s while the ground temperature (and ground water temperature) is still recovering from winter and in the 40s (ground water temp coming out of our faucet is almost exactly 50F).  There were 8 ounces of various hops residing in my freezer that I thought would go towards a delicious IPA.  Dry yeast was an easy way to get back into the swing of things and US-05 is always a good yeast.  All I needed was water and grains.

I've read all kinds of good things about floor malted Marris Otter.  I know it's not an American malt, but it gets rave reviews in all beer styles, including IPAs.  Here is how the scene unfolded:

24# Floor Malted Marris Otter
1# Carapils

Mash at 151F for 60min
Raise to 170F for 15min

Preboil OG on 13 gallons (only 1.046...I missed my goal so added some DME to bump it up to 1.051)

2 oz. of Northern Brewer (10.6%AA) at 60 min
2 oz. of Chinook (11.8% AA) at 15 min
1 oz. of Willamette (4.7% AA) & 1.3 oz. of Simcoe (12.2% AA) at 5 min
1.7 oz. of Simcoe (12.2% AA) at 0 min

The beauty of this time of year is ground water temperature.  I use an immersion chiller with a recirc pump to push my hot wort across my cold coil.  I was able to chill this 10 gallon batch to 60F in 20 minutes. That's some serious chillin, Batman!

A nice addition to my brewhouse is a 16 gallon plastic fermentor I grabbed off of MoreBeer.  It's german made and seemingly of very good quality.  The plastic makes it easy to move 10 gallons around, and the wide lid makes it easy to clean.  I've read very good reviews on these fermentors, so hopefully it serves me well.

Picture time!

The mash.  My 10 gallon batches really push the limits of my 12 gallon mash tun.

Hop Spider in action.

The fermentor.  I'm excited about this addition to the brewhouse.

One of my favorite ways to end a brew day.
I plan to dry hop this batch of brew with another 2 oz. of Simcoe hops.  Hopefully I will be kegging this batch up in about 2 weeks and tasting within a month.

My old hop stash is all gone.  My next couple of brews will be a little funkier (Belgian Wit?, Bavarian Hefeweisen?).

I know I'm bad about keeping my blog up-to-date.  But between a renewed passion for brewing, and a lot of excitement in daily life in Fayetteville, I hope to be writing again soon.

To Build a Tube Pre-Amplifier

Those who know me, know I've been known to dabble in high-end audio equipment.  It all started when my old man entrusted me with a system he had purchased/built in the 1970s.  He had built the speaker enclosures to pair to a Pioneer receiver and BIC turntable.  While the definition of what is truly 'high-end' can be debated, his system was nothing to blink at when he had his records spinning.  That system has since been adopted by my tchwin, Mark.  In it's stead I bought a smaller system better suited for integration to our TV and Blu-ray player.  I won't go into the details here but it is also a very good sounding system.  I simply enjoy good sounding music.  But the 'tinkerer' in me won't let me just sit idly by and listen.  I have to wonder, 'What makes good audio?'.  So I read about these sorts of things when the mood strikes and when I have the chance to tinker with equipment, I do.

I stumbled upon a company called, 'Bottlehead', that deals all things DIY audio kits.  They have a very well regarded tube pre-amp kit called, 'The Quickie'.  It's $99 of components that, with a solid list of instructions, you are left to assemble/solder.  I decided to jump in and try my hand at building me one of these tube pre-amps.  It all went pretty smoothly and was completely built in about 4 hours.

This is the back of the board where all the hardware mounts and the wiring connections are made.

What good is a project without a beer?  I've been enjoying smoked beers lately.

All wired up.  Resistors, capacitors, potentiometers, tube sockets, etc.

This is the board 'right-side-up' with the tubes (cylindrical glass things on the left and right of the middle knobs) installed.  The board is sitting in a wooden base that I also bought from Bottlehead for $40.

Ashley snapped a picture of me in action with my soldering iron.  Notice the glasses.  Safety first, people!

So what do you do with a 'pre-amp'?  Well most audio receivers have a pre-amp section and a power-amp section to take line-level audio and amplify the signal enough to drive loudspeakers.  My Outlaw RR-2150 receiver is one like this.  But there are jumpers at the rear of the unit that connect the pre-amp section to the power amp section.  When I removed these jumpers I was able to run my CD player (Blu-ray player) through my hand-built pre-amp and then run cables from the pre-amp into the 'Main-In' (i.e. power-amp input) on my Outlaw.  The results were pleasing.

In side-by-side comparison with the pre-amp section in my Outlaw using a CD track of Wilco's 'Impossible Germany' as my reference I was able to see just how good this little 100 dollar pre-amp is.  The truth is, I struggled to differentiate between the two set-ups.  If anything, the tube pre-amp was a little more warm and maybe slightly more 'fuzzy' than the Outlaw.  But 'Impossible Germany' was impossibly delicious every time I listened.

All in all this was a great little 'tinkering' project for me.  I learned a lot and got to practice soldering. All said and done, it was $150 very well spent.

If any of you decide to swing past the house I'll be more than happy to give you a listen.

Saturday, August 3, 2013

Split Batch English Special Bitter and Belgian Pale Ale

Well, I'm a week late in posting, but I've brewed my 3rd ten gallon batch since upping my brewery capacity.  My second batch, which I failed to blog about was a Hefeweizen which is currently in a keg carbonating.  I have high hopes for it.  My first batch, an English Mild, turned out very well.  But it is an English Mild, pretty straightforward and a little too malty for this time of year.

In this batch I was trying to re-use the yeast from the Mild, but I didn't want another 10 gallons of English beer.  Additionally, I've recently found myself interested in all things Belgian beer.  So I thought to myself, 'What would be a good 10 gallon batch of brew that could be easily split to two 5 gallon fermentors and one fermented Englishly and one fermented Belgianly?'  Given the time of season I also had to ask myself, 'What style of beer would be most drinkable this time of season?'  I soon decided that an English Special Bitter would certainly be a good English beer for this time of year and so I thought, 'Perhaps 5 gallons of that wort would make a good Belgian Pale Ale?'

Those who know my brewing style know that I much prefer to make good classic styles that challenge the more technical aspects of brewing more than I like to make unique beers with unique recipes.  I figure if I can make a good classic style and do it repeatably, then when I try my hand at unique beers the result (good or bad) would likely come from ingredient selection rather my brewing prowess.  I digress.

I turned my eye to my faithful book of classic style recipes from Mr. J.Z.  I found that there were a lot of similarities between his English Special and his Belgian Pale.  The differences I felt I could bring to a common ground for the better of this experiment.  Here is the recipe I dreamed up on my own:

18# Dingemann's Belgian Pale Malt
2# Crystal 20L
1# Belgian Cara45
0.5# Crystal 120L

Mash at 151F
Preboil Gravity: 1.044

2.2 oz EKG (5.8%AA) at 60 min
0.8 oz EKG (5.8%AA) at 20 min
0.8 oz EKG (5.8%AA) at 0 min

OG:1.052

5 gallons get hit with WLP002 English Ale Yeast, the other 5 gallons get hit with WLP530 Trappist Ale Yeast.

A week into things and the WLP002 batch has acted as expected.  Pretty quick fermentation with Krausen falling completely around day 4.  The WLP530 took that many days to reach high Krausen before slowly subsiding.  There is still krausen activity though.  I will let both carboys sit at least another week, probably another 2 weeks, before kegging.

One thing I wasn't happy about during the brewday was I ended up getting a lot of the cold-break material into the English Ale fermenter.  I still need to iron out my process of getting from the kettle to the fermentor while leaving as much excess material behind.  Here's a couple pictures form the day:


Belgian fermenting along.

English fermenting along.  Check out that color difference.  Same exact wort looks much lighter though!

Sunday, June 23, 2013

First Official 10 Gallon Batch, A Mild Ale

I recently made the decision to step up to 10 gallon batches for brewing beer.  The benefit justifies the additional equipment costs.  I can make twice as much brew in basically the same amount of time.  I have friends here in NWA who enjoy my brews and I enjoy sharing.  I made a Belgian Witbier a few weeks back that was gone within 24 hours of being tapped (it was taken to a party).  I decided in order to share my brews while still having my share to consume over a few weeks, I'd need to double my batch sizes.  And yes there will be instances where there won't be a party to attend or a friend to take the keg, but who ever complained about having too much beer?  I've also figured I can do yeast experiments on the same 10 gallon batch with two different yeast strains each fermenting 5 gallons.  Or maybe even 4 yeast strains fermenting 2.5gallons...you get the idea.

But I've put my foot in the '10-gallon brewing system' water.  I haven't dived completely in.  I've kept some equipment from my 5 gallon set-up in the rotation.  All I've really bought is a bigger boil kettle, a pump, and bigger burner, and a bigger immersion chiller.

I decided my first 10 gallon batch should be pretty straightforward with not too many hops and also not too many malts.  I decided an English Mild would be a good session beer for the summer.  I took the recipe directly from Jamil's 'Brewing Classic Styles' (stepped up for 10 gallons of course):

14# British Pale Malt
1# Crystal 60L
0.75# Crystal 120L
0.5# Pale Chocolate
0.25# Black Patent

1.7 oz of 5%AA East Kent Goldings Hops at 60 minutes (I actually used 2 oz of 5.8% but more on that later)

Mash at 154F for 60 minutes

Original Gravity: 1.036 (this is what the recipe predicts, I did much better more on that soon)

WLP002 English Ale Yeast with a 2L starter

Yeah so like I was saying I somehow got an OG of 1.048 which works out to like 95% efficiency.  I'm not sure that is even possible so my only logical explanation is that I had more grain in there than I realized (I ordered from my LHBS and picked-up after hours so they put the grains together for me and may have given me too much).  Anyways, with the increased gravity I decided to increase the hops too to keep things in balance).

Brew day went pretty well.  The main consideration with 10 gallon batches is that, unless you are beast of a man, you aren't going to be picking up and moving around vessels once they are full.  So I boiled and cooled my batch all on the burner stand and then drained straight into a fermenter from the burner stand as well.  OK, enjoy the pics....and we will see how this batch turns out!

Night before brewday, making sure the new burner is working....it is!

On the way to a boil, 13 gallons in a 15 gallon pot is a bit of a push but I  didn't have any boil overs!

Still using the same old mash tun.  Here's a shot post-mash.

My cooling set-up ain't so janky anymore.  JZ style immersion chiller.  Hose water runs through coil as normal, March Pump pumps worts from bottom of kettle up to immersion chiller fitting which runs tangentially in on the coil wall to create a little whirlpool action.
The only big hiccup during the brewing session is that my ground water at the house was coming in at 75F.  So the coldest my wort would get was about 76F.  I had to transfer to my fermenters and put them in the house for a few hours to cool off more before pitching the yeast.

For fermentation I am trying something new.  I don't really like glass carboys.  They are hard to move around when full, they are hazardous glass bombs whilst carrying (should you slip and drop one), and they are hard to clean...though my oxi-clean revelation has really helped with that.

I have been reading lately that a lot of breweries still use open fermentation vessels which are typically shallower and wider than the mainstream stainless cylindroconical fermentors that most craft brewers employ.  I decided to repurpose my old 10 gallon Volrath Stainless pot as fermentor.  I scrubbed it down real good and sanitized it before putting wort in it.  I have half the batch in a glass carboy and the other half in this Volrath pot with a loose fitting plastic lid (just to keep stuff from falling into it).  We will see if there are any differences in the two final beers!


That's not puke on the top....its krausen!

Monday, May 27, 2013

A Honeymoon in Barbados!

After our wonderful wedding weekend, Ashley and I were able to escape to the Caribbean for 10 days of complete relaxation.  Most of this post will just be pictures with captions.  So enjoy.  For those that don't know, we ended up switching resorts after the second day because of an incident at the first resort (we can explain better individually, not worth typing up the whole story here).  We decided it would be better to leave and enjoy our honeymoon elsewhere.  It didn't dampen our spirits and we left Barbados completely relaxed and with tons of good memories.  Enjoy the pics!!

Flight into Barbados.  American Coke on left, Caribbean Coke on the right.  Biggest difference: Caribbean coke had about 1/3 of the Sodium and had cane sugar (not high fructose corn syrup) in it.

The plane landing in Barbados.


On the walk down to Bathsheba Beach


Bathsheba Beach, Atlantic Coast.


Big Rock.  This beach reminded us of something out of a pirate movie.

Ow Oooowwwww!

Bow chicka wow wow


Sea-U Guest House.  Where we spent our first 2 days.  We were really having a great time, shame we had to leave.

Rum punch.  The drink of Barbados.  We had plenty of these during our stay.  This is a pic from the lawn of Sea-U, just up the hill from Bathsheba Beach.

My beautiful wife with a rum punch.  In front of the Sea-U.

I had a whole lotta these.  This is the main beer of Barbados.  A typical pale lager.  Perfect drink for the hot Caribbean weather.

Our catamaran trip.  A wedding gift from James and Krystal!  It was an awesome boat and a beautiful trip.

Hairoun Lager.  A little dryer than Banks, I didn't like it as much but it went down just fine!

Getting ready to snorkel!

Sandy Lane.  Apparently the most exclusive resort on the island.  We anchored out front for lunch.


She looks like she could own a boat like this.

No caption necessary.

A lot of pretty plants on the island.

Enjoying a coconut cocktail on Crane Beach ('The Crane' was our second resort of the trip)

One of about 5 pools at The Crane.  Overlooking the sea.

Breakfast burrito at Cutters Deli.  Delicious w/ a french press coffee.

Up on a diving cliff on Crane Beach.  Ignore my hair.

Crane Beach

Ice cream break!  Hey, we needed it after our diets leading up to the wedding.

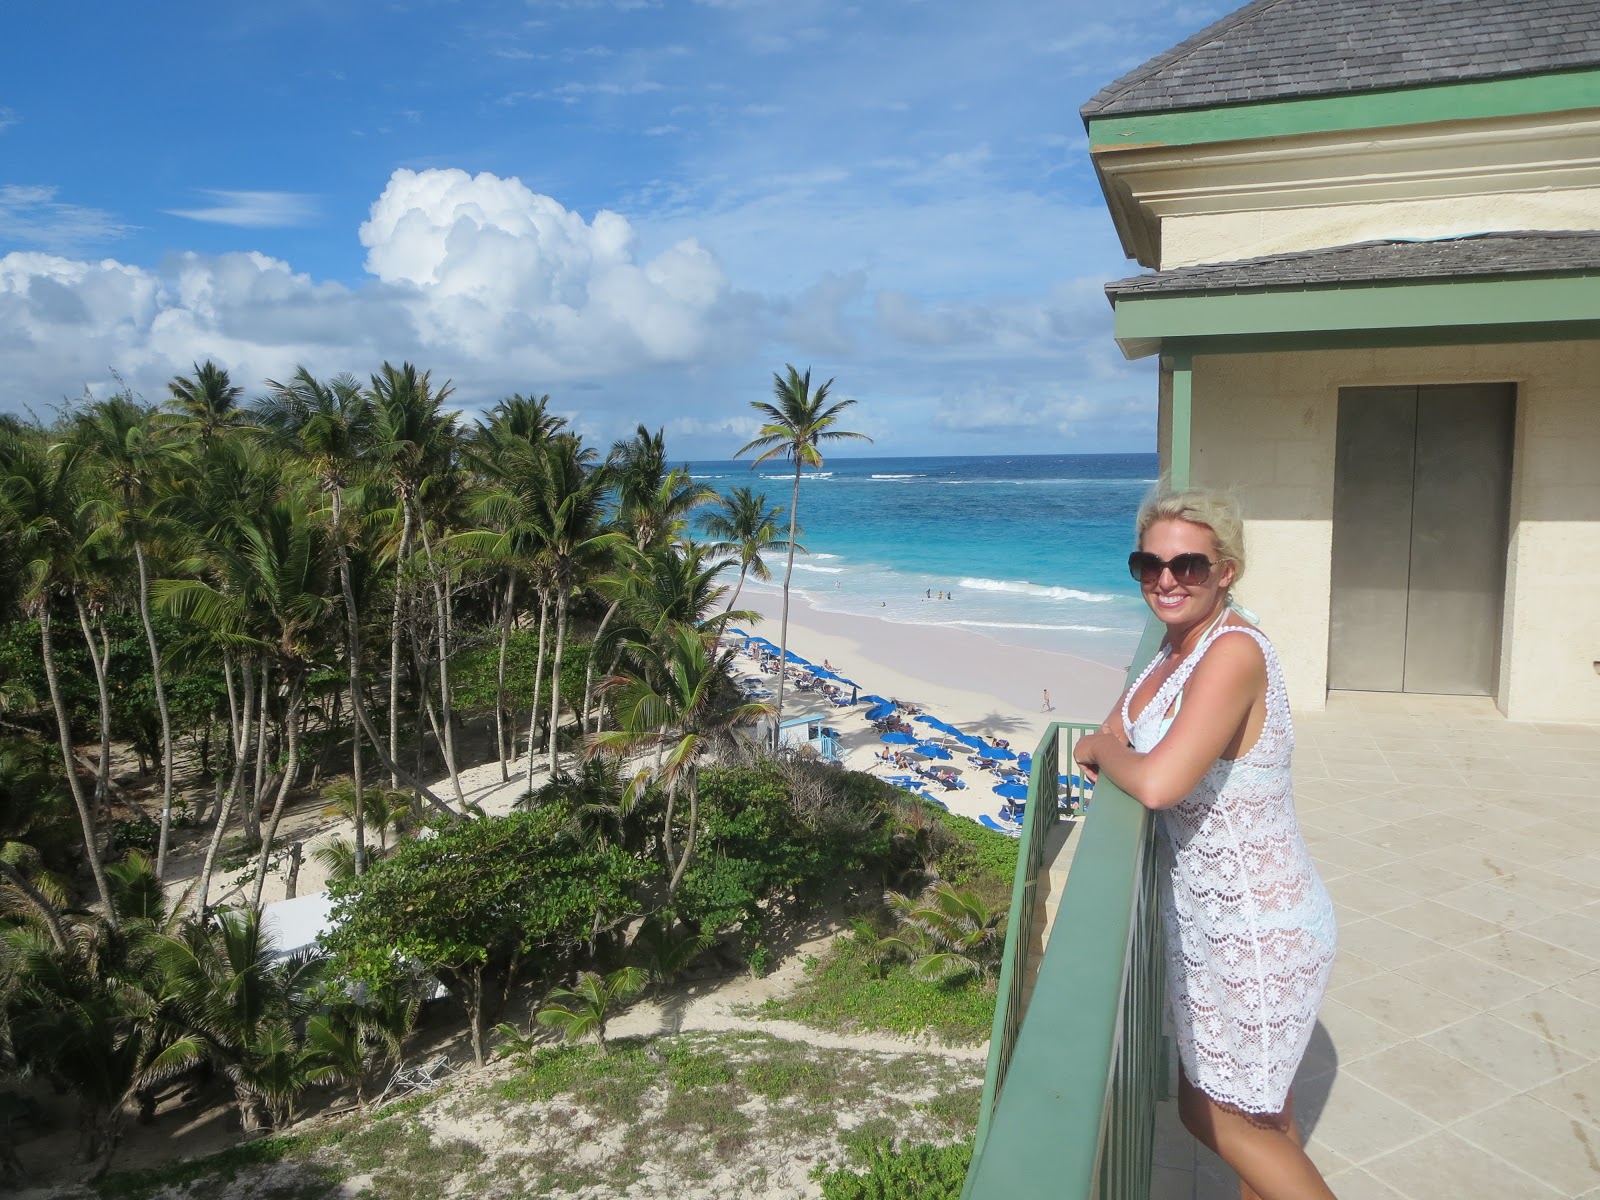
Ash, enjoying the view.

The resort had several larger buildings.  The one in the background here is the original hotel from the late 1800s.

Another pool overlooking the ocean.

For anyone who has knowledge of it, this is my attempt at recreating the infamous 'Sandcastle' photo.  Sans Mark, of course.

Oistin's bay.  Fish fry on Friday night.  

Our fish platters.  Absolutely delicious.

Those were mostly my bottles, but Ashley had one or two!

Royal Barbados cigar.  It was ok.

If you build it, she will find it!

Lunch on the Caribbean side (Sea-U was on the Atlantic coast, and the Crane was on the South coast, Caribbean is the west coast).

A view from one of the higher points on the island.  The picture doesn't really do it justice.

Before one of many date nights.

Piton lager.  The clear glass made it a skunk bomb.

View from the elevator leading to Crane Beach.


Sunset in Barbados (we weren't staying on the west coast so we never saw it set over the water.


Nighttime view down on Crane Beach.


A picture taken back towards Crane Beach.  I had taken a stroll down the shore to explore the beach beside Crane beach.


A preview of the beach just beside Crane beach.

Basically a deserted beach.  It was gorgeous.


Lunch at the tiki-grill in the grove behind Crane Beach.


Our hotel room.  Living room.

Bedroom.

Bedroom again.

Bathroom.

Kitchen.

This lady loved Ashley.  Thought she was Miss Arkansas.

Trying to show off our tan lines!

A favorite food stop for us. 


Entrance to The Crane.

Valence, our cab driver for the whole week.  He was partial to Ashley, obviously.
Well that's all we got for now.  We have plenty more photos but this is a good cross-sampling.  Writing this post made us miss the island.  I guess we'll have to go back!